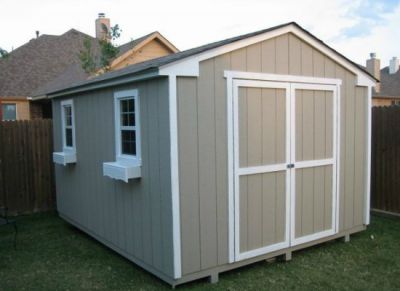
How to brighten up your shed by fitting it for windows
Exclude installing electricity in your outdoor shed blueprints and use windows in order to brighten up the interior of your shed ( 8×12 lean to shed plans ) . shed making plans that have windows which face east or south will allow the most amount of light to enter. A simple and charming way to dress up your shed is to use windows of barn sash. Straightforward single pane windows with plain frames made of wood should be available at any outdoor store. Barn sash windows are versatile and can be hinged on the side or top. You can use the interior walls in a outbuilding as hanging storage so don’t overuse windows. Skylights let a flood of overhead light into a outhouse and unlike windows can leave wall space free. Plastic dome skylights are inexpensive alternatives to skylights made for houses. Dome skylights are easy to install as all you need to do is find where you want it and nail on the spot. To make the skylight more attractive place shingles around it to hide its base.
Roof trusses help because not only do they support its roof but they also stabilize the walls. For easier installation it is best that you assemble all your timber on a concrete floor horizontally ( more tips here ) . To prevent your timber from getting damp during set-up you should make sure to work on day with no rain. If you frame your roof one rafter at a time you will spend half the day crawling up and down ladders. You can buy prefabricated roof trusses that will save you time and spare your knees. Roof trusses consist of a prefabricated assembly of two rafters fastened to a ceiling joist. All parts of a truss are held together with plywood gusset plates. Position your trusses at least sixteen inches apart when installing. Manufactured roof trusses in standard sizes are inexpensive and easy to use. Call your local lumberyard for prices and options regarding roof trusses.
Use any type of insulation to prolong the life of your outdoor creating
Before working with insulation you should put on a face mask and wear long clothes. Measure the outbuilding’s interior walls from the footer boards up to the header boards ( making a gambrel shed ) . One type of insulation is a sheet of treated plastic commonly known as an air barrier. Anyone can install plastic lining plus it is really simple to handle. Drafts of cold air from outside will have a harder time entering the outbuilding once the barrier is in place. Layer and overlap the plastic air barrier on the walls in the outhouse fastening as you go. The plastic liner will now work as a base for any additional insulation. A great layering insulation that is often times used is well-known fiberglass. Fiberglass insulation can be aggravating to breathe and touch so it is essential that you conceal it with an additional layer. Hide your fiberglass insulation with drywall and screws if you want to finish the interior walls with paint.
How to decide what kind of roof is right for your outbuilding
Midsize sheds work well with affordable and long lasting shingles. Cedar shingles have great life spans of 30 to 50 years. Center some setting up felt across the top of the roof’s surface and staple into place. To install shingles simply follow the pattern according to your shed blueprints. As you lay the shingles you can nail them down with roofing nails. If you get really into it you could even use tar to fasten the shingles. When all the shingles have been laid down on the roof you can start shaping them. You will need to cap the top of your outhouse by bending and overlapping the shingles. Not only will bending the shingles over the roof make it last longer it will also ensure it against water leakage. Buy the thickest shingles you can find if you want to invest a little extra in making your roof durable.
